This may help you learn your new digital SLR camera setting. I have tried to simplify photography techniques to make your DSLR understandable. I have been a photographer for almost more then 10 years. My aim with this site is to simplify the learning process of getting to know and use an entry level Digital Single Lens Reflex (DSLR) Camera, and its kit lens 18mm-55mm or dependent on make of camera.
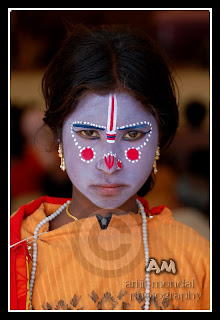
Some Basic Digital Photography Tips for all portraitater should be in your mind during photo shoot.
Photography Tips 1: Grab your manual.Your manual will not teach you photography, but it will teach you to know your camera, and what all the “whistles and bells” are for, where they may be located, and how they function.
Photography Tips 2:Go into the menu of your camera, and find the menu “Reset” . Click this, and all settings, (if you have altered any) will revert to factory default settings.
Photography Tips 3:Now is the time to set up your camera for optimum results, with just seven basic settings. These settings will be used as a base, to take you through several kinds of photographic options, with any deviation from these basics being emphasized in the text.
- ISO setting - Lowest
- Exposure Mode - Aperture Priority (A/Av)
- White Balance - Auto or Set on “Cloudy” For warm images.
- Drive Mode-Set this to “continuous”, then you will always be ready to capture the unexpected moment
- Metering Mode - Set it to “Matrix/ Evaluative/Multi-segment”
- Focus points - Centre only-The reason for this is that on most entry-level cameras, The only focus point that has cross sensors, is the central one-as others will have only either vertical, or horizontal sensors only-and you have to be at 90 degrees to these, to be accurate with your auto-focus.
- Auto-focus Mode - Set auto-focus to single shot, then the shutter will only fire when the subject is in focus (every shot will be sharp)
How to set focus points in viewfinder
detach lens, (so you are adjusting focus on focus point, not image) - adjust dioptre (next to viewfinder) so focus points are sharply in focus. (easier against a white, or light background) Re-attach lens. Right! Camera all set up for Optimum capture. Now let’s find subjects to make images of……
Digital Photography Tips : The outdoor Portrait
Portraiture, in photographic terms, is mostly about capturing the inner person, rather than just what they look like. The odd mannerism, or character trait that others may recognise who know the subject. This requires some communication between photographer and subject, to draw out the subject’s personality. There are several things to think about when making a portrait: light; simplicity; posture; lens focal length; composition; focus and metering. I’ll take these in turn to explain what to do.
Outdoor Portrait Setting for beginners:
ISO: Lowest
Exposure mode: A/Av (Aperture priority)
White balance: Cloudy (6250 Kelvin)
Drive mode: Continuous (Don’t want to miss those fleeting glances!)
Metering mode: Centre-weighted
Focus points: Centre
Auto focus: Single shot
Extra Camera Tips
a) Upping ISO if light levels drop.
b) Spot meter from subject’s face if mixed lighting is employed, or if subject is backlit.
c) You may need to increase ISO, or use a tripod, if F 5.6 doesn’t give you a shutter speed of at least 1/ 125sec
Secret Photography Tips for Portrait : Focus on Subjects Eyes For portraits.
Light
Concerning portraits, It is better to use a non-directional (Diffused) light source, due to the gradual gradation of its shadow, which doesn’t mar the portrait. If you’re shooting outdoors, for the best modelling you will want the light to strike the model’s face from the side, at 45 degrees vertical and horizontal. First get out of the direct sunlight, either in the shade of a building, or under the shelter of a tree. This will result in your model being lit by a diffused, non-directional light source, skylight or reflected light from surroundings. If you position your model looking towards this light source , the face should be lit with soft, delicate light. All you need to do is to move your subject, or your camera, to get light crossing the face.. What you want to achieve here is to have one side of the face brighter than the other by two stops exposure, giving a 3-dimensional rendering to the portrait. In case there is no tree, or building, you may need to resort to scrims, reflectors or blacks to modify the light to suit. Scrims are sheets of translucent material that are held between the sun and the subject to diffuse direct light. Reflectors are panels of card or material that reflects light, providing a soft quality of light. Usually white, silver or gold in colour, light bounces off the surface and into the shadow areas of the face. Blacks are the opposite of reflectors and they absorb light, instead of reflecting it. Or you can use your pop-up flash as fill in, and as a bonus this will produce nice catch lights in the subject’s eyes
Simplify Portrait Photography Tips
As your subject needs to be the centre of attention in your image, you won’t want unnecessary clutter in foreground or background. Try to emphasise your subject by putting them against a simple plain background, but, if you want to give a sense of location, attempt to find a viewpoint that is simple and uncluttered.
Another way to emphasise your subject, is to fill the frame; alternatively, you could use shallow depth of field rendering the background out of focus-subject will appear sharp, with background blurred. Best way to do this is with a large aperture, in your case with a kit lens- F 5.6 (you will need to position your subject a good distance from background at this aperture to get the bokeh blur you require.)
Subject Posture for Stunning Portrait
You will need to gently coax your portrait subject into an appropriate pose for his/her portrait,-not an easy task for the beginner. They must feel relaxed and confident if you are to portray them adequately. If they turn their body at about 45 degrees to camera position, then look back to just over your left shoulder, this will induce dynamism into the portrait and will make the body look slimmer. Sometimes it just pays to talk to your sitter-ask them to tell you their story, and you must be aware of the nuances of character as their story is related, and be ready to capture those little subtleties.
Best focal length for portrait photography
The ideal focal length of lens for portraits, is somewhere between 80mm and 135mm, using 35mm(Full-frame) film standards. So that means the telephoto end of your kit lens , 55mm- is equivalent to 86mm in 35mm (Full-frame) terms. Using this 55mm setting will enable you to make a head and shoulder shot from just a few feet away, without distorting your subject’s features, which a shorter focal length would do. If you want to include more of the scene , you can use shorter focal lengths, but you will need to keep a fair distance from your subject to avoid distortion.
Photography Tips for Portrait Composition
How do you intend to crop your portrait in the viewfinder frame? Head shot?; Head and shoulders? Three-quarter length? (quite popular); Full length? How about angle of view?Shooting from our eye-level, isn’t necessarily the most appropriate solution. From above eye-level your subject will appear submissive, or passive, and from below they will look domineering.
Photography Tips on Focus for Portrait Photography
They eyes we are told, are the “mirror of the soul”, so it will pay you to focus on the eyes, using centre focus point, holding shutter button halfway down, then recompose your image for the crop you want.
Photography Tips on Metering for Portrait Photography
Centre-weighted metering mode is ideal for front-lit and side-lit portraits, but backlighting can confuse the meter. Try using spot mode on subject’s face for backlit situations
Got it all together? Go take your shot-chimp your camera’s monitor screen, and if it’s too dark, or too light, use your exposure compensation, or increase ISO if necessary.Look for Exposure Compensation in your Camera Manual, so you know where to find it, and how to use it.


 Posts

